

When the temperature inside your reefer hits 40°F, you’re not just losing cargo—you’re losing client trust. For fleet managers, refrigeration truck repair isn’t about guesswork; it’s about systematic diagnostics.
This guide breaks down 7 field-tested fixes for the most common breakdowns—from compressor seizures to faulty door seals—so you can get your refrigerated box truck back on the road faster. This article covers 7 powerful fixes for common refrigeration truck repair issues—from compressor faults to body integrity checks. Each fix uses clear, simple steps.

Table of Contents
1. Fix the Compressor First
The compressor is the heart of your refrigerated truck’s refrigeration system. When it fails, the entire system stops.
Symptoms: Unusual noise, vibration, overheating, or complete failure to engage. A sharp squeal during startup often indicates belt slippage. A metallic clatter suggests loose mounting bolts or internal wear.
Technical Fix:
- Listen for abnormal sounds during startup.
- Check the compressor mounting brackets. Tighten any loose bolts.
- Inspect the electromagnetic clutch. Apply 12V directly to the clutch terminal. If it does not engage, replace the clutch coil or the entire clutch assembly.
- If the compressor runs but does not build pressure, suspect internal valve failure. Perform a pressure test. Disconnect the compressor low-pressure line, plug the high-pressure side, and start the engine. If pressure stays below 15 kg/cm², replace the compressor.
Pro Tip: Most compressors fail due to oil starvation. Check the oil level regularly. Dirty or low oil damages internal pistons and seals.
2. Stop Refrigerant Leaks
Refrigerant loss is the number one cause of poor cooling in refrigerated reefer trucks.
Symptoms: Slow temperature pull-down, visible oil stains at pipe joints, intermittent liquid flow in the sight glass, or bubbles in the sight glass.
Technical Fix:
Perform a leak test on all connections: compressor shaft seal, high-pressure exhaust port, low-pressure return line, and all pipe welds.
Use an electronic leak detector for accuracy. In the field, a soapy water solution works well. Apply the solution with a small brush. Bubbles mean a leak.
After identifying a leak, repair it. Then pressurize the system with nitrogen to 1.2 MPa and hold for 24 hours. If the pressure holds, evacuate the system and recharge with the correct refrigerant.
Key standard: The new BS EN 17893:2024 standard specifies requirements for using flammable refrigerants (Class A2L, A2, A3) in temperature-controlled vehicles. This includes risk analysis using HAZOP or FMECA methods for service and maintenance work. Always check the refrigerant type before recharging.
3. Unblock the Thermal Expansion Valve (TEV)
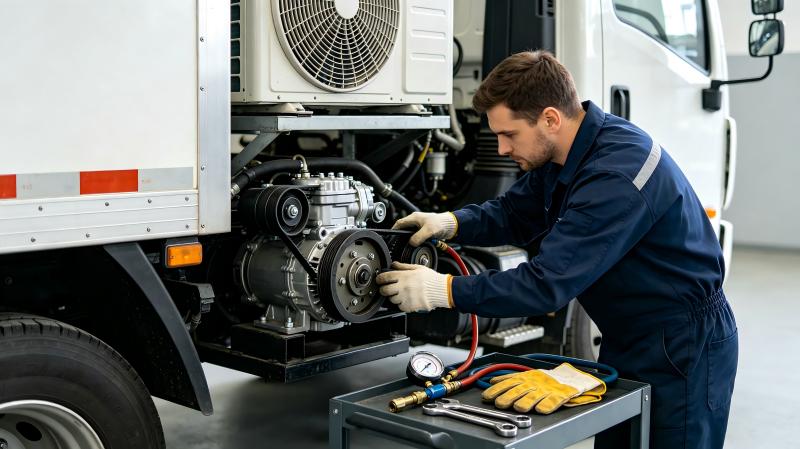
The TEV controls refrigerant flow into the evaporator. A blocked or misadjusted TEV kills cooling efficiency.
Symptoms: Dirty blockage (debris in the valve screen) or ice blockage (moisture freezes inside the valve). Insufficient frost on the evaporator coils, or the compressor runs “wet” with liquid refrigerant.
Technical Fix:
- Remove the TEV sensing bulb and valve cap.
- Check the inlet screen for debris. Clean it with solvent and dry it with nitrogen.
- If you encounter an ice blockage, it indicates moisture contamination in the entire system.
- Adjust the valve opening using a flathead screwdriver. Turn clockwise to decrease flow (smaller orifice) and counterclockwise to increase flow. Set the superheat to the manufacturer’s specs—typically 5–8°F at the evaporator outlet.
4. Restore Airflow & Insulation
Clean coils and a sealed body work together. Dirty coils block airflow. Damaged insulation lets cold air escape. Both force the refrigeration unit to run harder. Both shorten the system’s lifespan.
Symptoms: High discharge temperature, poor cooling, high head pressure, the unit runs constantly, and ice buildup on interior walls.
Technical Fix:
Condenser coil: Spray high-pressure air or water from the inside outward. Remove dust, paper, and debris trapped in the fins.
Evaporator coil: The evaporator core sits inside the truck body. Remove dirt and dust that accumulates on the coil fins. Debris blocks air recirculation.
Evaporator fan motor: Check the motor voltage. If voltage drops below 12V, the fan spins slowly and moves too little air. Inspect the 12V alternator and load distributor.
Cargo body shell: Inspect the outer shell for cracks, scratches, or dents. Damaged fiberglass exposes the polyurethane foam insulation. Moisture gets in and reduces the R-value.
Door seals: Close the door on a piece of paper. If you can pull the paper out easily, the seal is weak. Replace or adjust the door gaskets.
Defrost drain hose: Clear the drain hose. A blocked drain traps moisture inside the body. This creates ice buildup that blocks evaporator airflow.
5. Inspect Electrical Components
The electrical system connects the engine, thermostat, sensors, and compressor clutch. Loose connections or corrosion cause intermittent failure.
Symptoms: Intermittent cooling, the unit shuts off randomly, or the compressor clutch does not engage.
Technical Fix:
- Check the battery terminals for corrosion. Clean them with a wire brush.
- Tighten all electrical connections at the compressor, thermostat, and control panel.
- Check the fuse for the evaporator fan motor. Replace it if blown.
- Test the thermistor (temperature sensor). Measure resistance at the sensor. Compare the reading against the manufacturer’s temperature-resistance chart. Replace it if it drifts out of spec.
6. Replace Belts and Pulleys
Worn belts reduce compressor speed. They cannot pump enough refrigerant. Broken belts stop the compressor altogether.
Symptoms: Squealing noise on startup, visible cracks on the belt surface, or a loose belt.
Technical Fix:
- Push the belt with your thumb. The belt should deflect about 0.5 inches at the midpoint.
- If the belt is cracked or frayed, replace it with the exact OEM part.
- Adjust the belt tension by loosening the compressor mounting bolts and moving the compressor outward. Retighten the bolts after setting the tension.
Conclusion: Refrigeration Truck Repair
Refrigeration truck repair demands a systematic approach. We covered seven essential fixes. The compressor, refrigerant levels, expansion valve, and coils are the core systems. Electrical and belt issues cause common secondary failures. Body integrity ensures long-term performance.
For fleet operators, a reliable refrigerated box truck protects your cargo and your bottom line. When you buy a reefer truck, look for a refrigerated truck company that provides strong after-sales support. They should offer parts and technical manuals.
If your refrigerated truck is over 7 years old or has logged more than 10,000 running hours, the cost of repeated repairs – plus the risk of spoiled cargo – often exceeds the investment in a new unit.
Looking for quality refrigerated trucks? Talk to our fleet specialists today – we’ll match you with the right reefer truck for your cargo and budget.
Frequently Asked Questions
What are the maintenance requirements for refrigerated trucks?
Why is my refrigerated truck not cooling properly?
Common causes: low refrigerant, blocked expansion valve, dirty condenser, or faulty compressor clutch. Start with a leak test using soapy water. Then inspect the valve screen.
How often should I service the unit?
Every 500 to 700 hours of runtime. Extreme conditions may require more frequent checks.
What refrigerant does my truck use?
Check the nameplate on the unit. Newer systems use R-134a or A2L refrigerants. Older units use R-404A.
Can I repair the truck body myself?
Minor repairs like replacing door seals are doable. For structural damage to insulated panels, hire a specialist. Damaged insulation reduces cooling efficiency.
